On this page
01 How it works
Online, nobody can touch a product. The photo is all the buyer has. That’s why good product photos sell and weak ones don’t. Big brands pay for studios, photographers, stylists and models. A small Etsy shop, a candle maker, a local bakery with a webshop or a one-person Amazon seller usually can’t. They take a quick phone picture on the kitchen table and hope for the best.
This is where you come in. The client sends you a simple, sharp photo of their real product. You cut the product out cleanly, fix light and colour, and then use AI to build what used to need a whole photo shoot: a clean white background for marketplaces, lifestyle scenes (the product “in use” in a nice setting), flat lays, seasonal visuals for Christmas or summer campaigns, and ready-cropped formats for the shop, Instagram and ads.
The single most important rule of this job: the product itself is never changed. Same shape, same colour, same label, same size. AI builds the world around the product — never a better-looking version of the product. That keeps your client honest, their buyers happy and their listings safe.
- Client photo
- Brief & style
- Clean cut-out
- AI scenes
- Accuracy check
- Deliver formats
- Repeat & retain
Three ways to package the same skill:
02 Is this for you?
- notice when a picture looks “off” — light, shadow, scale
- enjoy tinkering until an image looks just right
- are careful with details (a wrong label colour matters)
- like working with small business owners
- want active income that can start within weeks
- want fully passive income
- think AI will do it all in one click
- don’t want to learn a basic image editor
- get stressed by client feedback
- are tempted to “improve” products so they look better than they are
03 The “saturated” myth — where the money really is
Search “AI product photos” and you’ll find dozens of apps and hundreds of freelancers. So why would anyone pay you? Because most small shop owners don’t want another app. They want finished images that work, without learning prompts, cut-outs and export settings. And most of the cheap offers out there deliver generic AI pictures: the bottle floats, the shadow falls the wrong way, the label text is garbled, the mug suddenly has a different handle. Buyers notice. So do marketplaces.

A product image has one job: make someone trust what they are about to buy. AI hasn’t changed that job — it has made great images affordable for every small shop. The generic stuff is everywhere. Clean, honest, well-composed images for one clear kind of shop are still rare.
The money sits in three places:
- A sharp niche — one product category you get really good at. Jewellery, cosmetics, candles, food, furniture: each has its own light, props and style rules.
- Visible quality — perfect cut-outs, believable shadows and reflections, the right scale, and a product that is 100% the real one. That’s what separates you from one-click apps.
- Consistency — a shop with 40 products needs 40 images in one look. Delivering that reliably is what turns a one-off job into a retainer.
Broad vs. sharp: what a good offer looks like
04 What AI changes
Until recently, a lifestyle photo meant a location, props, lighting, a photographer and often a stylist — for every single product. A white-background image meant a light tent and hours of retouching. That cost was the reason small shops stayed with their phone pictures. Today, a good source photo and the right tools get you a whole set of professional images in an afternoon.
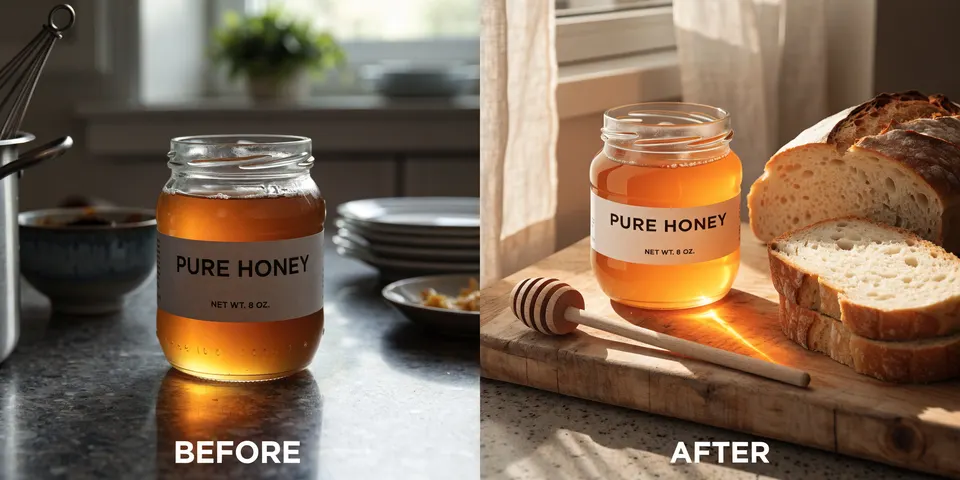
What AI does not do well on its own: keep small text, logos and fine details perfectly intact, get scale right (a tiny earring can suddenly look huge), and handle shiny, transparent or reflective surfaces. That’s why you work from the real photo, protect the product with a mask (a selection that tells the AI “don’t touch this area”) and check every image by eye. That checking is exactly what your clients pay you for.
05 Step by step — the complete process
All ten steps, from zero to paying clients. With a few evenings a week, you can have a portfolio ready in 2–3 weeks.
Choose one or two product categories you like and understand. Then study the best shops in that category on Etsy, Amazon and independent webshops.
- What do their main images look like? What do their lifestyle images show?
- Which light, colours and props appear again and again?
- Where do smaller shops in the same category fall short? That gap is your pitch.
- Save 20–30 examples in a moodboard (a collection of reference images) for later.
Honestly, you need proof before your first client. Photograph 5–10 everyday products from your own home — a candle, a mug, a bottle, a piece of jewellery — with your phone, in daylight. Then turn each into a white-background image and two or three lifestyle scenes.
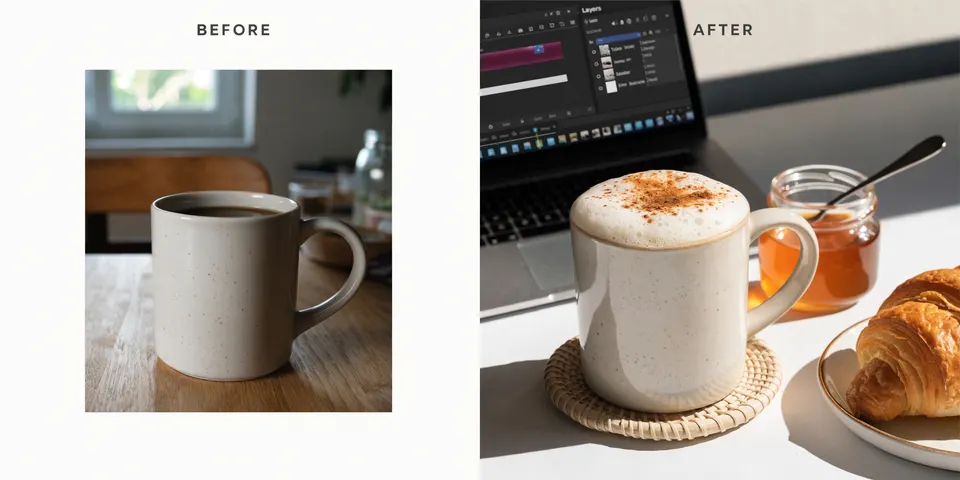
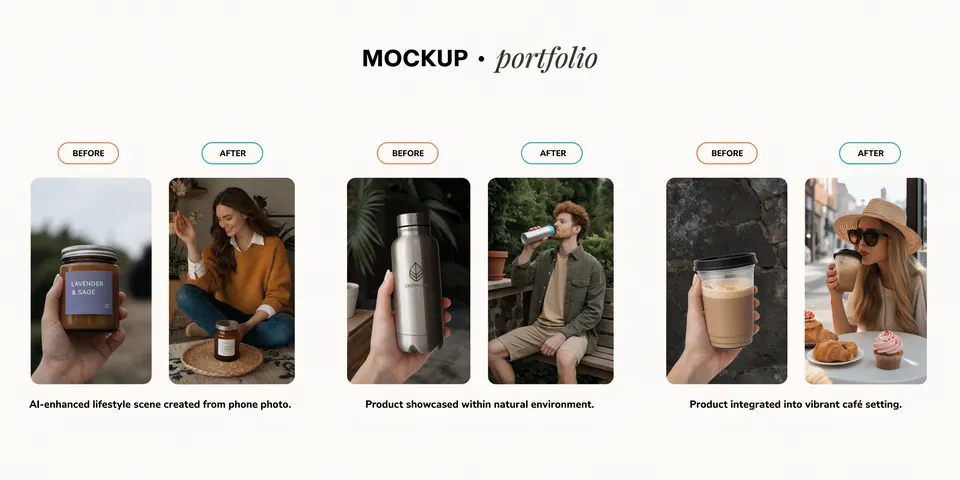
Show them as before/after pairs. Nothing sells this service faster than seeing the phone photo next to the finished image. Only show your own work and products you photographed yourself — never copy other people’s images.

And clients buy clarity. Offer three simple packages per product, for example:
- Basic — clean white-background main image + 2 cropped detail shots.
- Standard — Basic + 3–4 lifestyle scenes in one agreed style.
- Premium — Standard + a seasonal or campaign set + formats for social and ads.
- Always state: number of images, revision rounds, delivery time and file formats.
Your result is only as good as the source — I can’t stress this enough. Send every client a short photo guide:
- Daylight near a window, no direct sun, no flash.
- Plain background, product sharp and fully in frame.
- Straight-on shot at eye level, plus one from 45° above.
- Largest file possible — send the original, not a WhatsApp copy.
- For multiple colours: one photo per real colour variant.
Ask about the shop, the buyers and where the images will be used. Show 3–4 reference images from your moodboard and let the client pick a direction: warm and rustic, bright and minimal, luxurious and dark, playful and colourful. One agreed style saves you endless revisions.
- Where will the images be used (Etsy, Amazon, own shop, Instagram, ads)?
- Who buys the product, and in which situation is it used?
- Any props that must or must not appear?
- Real size of the product (in cm) — you need it to keep scale honest.
Remove the background with a tool like Photoroom or Photoshop, then zoom in and fix the edges by hnad: hair-thin gaps, fuzzy fabric, transparent glass. Correct white balance and exposure so the colour matches the real product. This clean cut-out is your “master” — every scene is built around it.
Generate backgrounds and scenes around the protected product, using the tool’s product mode or generative fill with the product masked out. Keep the same light direction as in the product photo so shadows look real.
Generate several versions, pick the best, then refine: match the shadow, add a subtle reflection on glossy surfaces, blend the edges. Upscale the final image so it stays sharp when buyers zoom in.
Before anything goes to the client, put each final image next to the original photo and check:
- Shape, colour, material and finish identical to the real product?
- Label, logo and text unchanged and readable (no AI letter soup)?
- Realistic scale — does the product have its real size next to the props?
- Nothing added that isn’t included (no extra lid, no second item, no accessory the buyer won’t get)?
- Props clearly decoration, not something the buyer might think comes with it?
- Marketplace main image — follow the platform’s rules exactly (see section 10). On Amazon that means a plain white background, the real product filling most of the frame, and no text, logos or extra graphics.
- Gallery images — lifestyle scenes, details, size comparisons.
- Own shop — consistent crop and background for every product, so the category pages look calm.
- Social & ads — square, portrait and story formats.
- Name files clearly (product_scene_format.jpg) and deliver in a tidy folder.
- Contact small shops in your niche directly: pick 10 Etsy shops or local businesses with weak photos, make one free before/after of their product from their public listing (for your pitch only, never publish it) and send it with a short, friendly message.
- List your service on Fiverr or Upwork with your before/after portfolio as the gig images.
- Walk into local shops: bakeries, florists, boutiques, craft stores with a webshop. Local businesses love a face they can call.
- Post before/after pairs on Instagram and LinkedIn — they’re made for social media.
- Before every season, email past clients: “Christmas is in 8 weeks — shall I prepare your campaign images?”
06 Tools
Start with research — knowing what top shops in your niche show is worth more than any tool. Tools change fast. Test the free versions and keep what fits your workflow.
07 Realistic expectations
Honestly: the first clients are the hardest. Expect to send many messages before someone says yes, and to price modestly at the start while you collect reviews and portfolio pieces. It gets easier fast once you have real client before/afters and one or two shops that come back every season. The people who do well here pick one niche, deliver the same quality every time and turn one-off jobs into monthly work. Give it 3–6 months before you judge.
08 Tips & common mistakes
- Do: Always start from the client’s real product photo — never generate the product itself.
- Do: Show before/after pairs everywhere. They sell your service in two seconds.
- Do: Keep one visual style per shop, so all products look like one brand.
- Do: Plan the seasons. Campaign images are easy repeat business.
- Avoid: “Improving” the product: brighter colours, smoother surfaces, bigger size. That’s misleading.
- Avoid: Delivering garbled labels or logos because you didn’t zoom in.
- Avoid: Using an AI scene as a marketplace main image where a white background is required.
- Avoid: Unclear packages and unlimited revisions. You’ll work for free.
09 Pros & cons
- Very low start costs
- Visible, easy-to-sell results (before/after)
- Huge saving for clients compared to a photo shoot
- Works online and with local businesses
- Seasonal campaigns bring repeat work
- Active income — no clients, no money
- Needs a careful eye for detail
- Tools change quickly, you keep learning
- Some categories (glass, jewellery) are tricky
- Client feedback and revisions are part of it
10 Risks & legal
- Misleading images: The product must look exactly like what the buyer receives — colour, size, material, contents. A changed product can count as misleading advertising and leads to returns, bad reviews and blocked listings.
- Marketplace image rules: Amazon asks for a main image on a pure white background showing only the real product, filling most of the frame, without text, logos or mockups. Etsy expects listing photos that show the real item — mockups and computer renderings are not allowed as the main image. Rules change, so always check the current help pages for the platform your client sells on.
- AI disclosure: Some platforms and ad networks ask whether content is AI-generated or AI-edited. Tell your clients to answer honestly where asked.
- Copyright & trademarks: Only use photos the client owns. Don’t put other brands’ logos or products into scenes, and don’t copy another shop’s photos or style one-to-one.
- AI models & people: Never use the face or look of a real person without permission. Use clearly generated models, and check the tool’s terms for commercial use.
- Tool licences: Use AI tools whose terms allow commercial use of the output, and keep a record of which tool you used for which client.
- Taxes & contracts: Freelance income is taxable. A short written agreement (scope, revisions, usage rights, payment) protects both sides.
General information, not legal advice.
11 FAQ
Do I need to be a photographer?
No. The client takes the source photo with a phone, following your guide. You need a good eye, patience with details and a basic image editor — all learnable in a few weeks.
Aren’t AI product photos “fake”?
Not if you do it right. The product is the real one, from a real photo. Only the setting is created — just like a studio backdrop or a styled table in a classic shoot. It becomes fake the moment you change the product itself.
Can clients use AI images on Amazon and Etsy?
Yes, with care. The main image has to follow each platform’s rules — on Amazon a real product on pure white, on Etsy a real photo of the item. Edited scenes around the real product work well as additional gallery images. Always check the current rules.
Why would a shop pay me instead of using an app?
Most shop owners don’t have time to learn the tools, fix edges and check every label. They want finished, consistent images for all their products. You sell the result, the accuracy and the time saved.
Can I add video later?
Yes, and it’s a natural next step. Many of the same tools now turn product images into short clips for ads and social media — a great upsell for existing clients.
The AI Product Photo Kit
- 3 service packages, ready to adapt
- Client photo guide: how to shoot the source photo
- Scene prompt pack (lifestyle, seasonal, flat lay)
- Product accuracy checklist before delivery
- Marketplace image checklist (main image & gallery)
- Before/after portfolio template